This section describes the different steps followed to design and produce a simple puzzle that represents the Lebanese map along with the different districts, using MDF material.
Step – 1 : Designing the Puzzle on Corel Draw

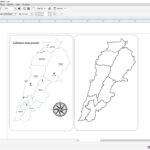
In order to Laser Engrave and Cut any object, you need to have its digital design. This is to be done using any Computer Aided Design (CAD) software. In this example, the puzzle was designed using Corel Draw . The image above shows the vector files we used to produce the various parts of our puzzle.
The puzzle constitutes of multiple parts:
The back which is shown in the vector file on the Right. The shown map will be engraved on the wood, and the external outline vector will be cut using the laser cutter.
The front which is shown in the vector file on the Left. The shown city & district names and the compass will be engraved on the wood. The perimeters of the districts and the front plate outline vector will be cut using the laser cutter.
Step – 2: Prepare Your File For Laser Engraving & Cutting

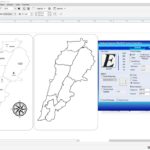
To prepare the Laser Cutting job, you should open the digital design file in a preparation software and choose the best settings that would achieve the best final result. In this example, we used Corel Draw as a preparation software.
- Choose Your Material: Typically you may have an idea about what kind of material you will use before you laser cut. This is very important to choose the best settings required for the chosen material. Preferred settings for different material can be found in the Machine’s Catalogue. Best settings are usually chosen based on experience and previous tests done. In this example we will be using 3mm Plywood.
- Select the outline as “Hair Line”: We select “hair line” for the lines that we want to be cut, in our case the outline circles, and we select “ none “ for the objects that we want to engrave.
- Choose Job Type: “Combined” was selected, as we are both engraving and cutting in this example.
- Choose Your Cutting Parameters: The next step is then deciding on the different parameters for engraving (Raster Settings) and cutting (Vector Settings). We have to choose the best settings we need to have the best result. There are different variables that affect the final product coming out of the Laser Cutter. Among those variables are the Power, Speed, and DPI. In this example the following settings were used:
- Raster Settings: Speed: 90%, Power: 25%
- Vector Settings: Speed: 9%, Power: 100%, Frequency: 10
- Forward the Job: After choosing all the variables, send the order to the laser cutter. But before pressing Play on the Laser cutter, we have to manually set it up the printer with respect to the material we intend to use.
Step – 3: Setting Up The Laser Cutter
After preparing the file and the relative settings we need, the next step is to place the material we want in the laser cutter and set it up according to the thickness of the material.
To cut and engrave on our laser cutter, the following procedure was followed:
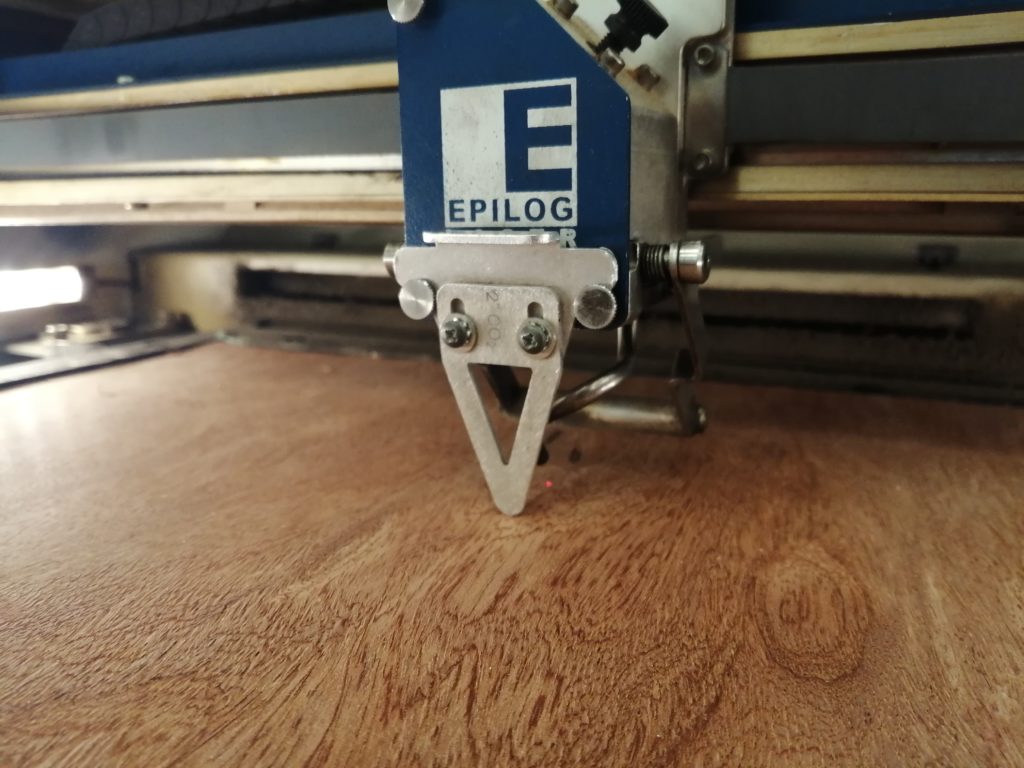
- Set the focus of the laser using the V shaped Gauge.
- Set the zero position of the laser on the top left corner of the plywood sheet.
- Turn On the Air compressor and ventilators .
Step – 4: Performing the Engraving and Cutting Job
This is when the magic happens!
Press the play button on the laser cutter, and voila, it starts engraving.
Step – 5: Remove Your Parts

Remove the laser parts from the cutting bed after it cools down and all the fumes are sucked out of the machine.
Additional post-processing steps are performed after cutting, such as brushing off powder and cleaning burnt sides.
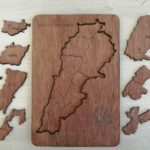
Step – 6: Assemble Your Parts

Once all parts are clean and ready for assembly, the back is simply glued to the front piece using wood glue. All the pieces together form a nice puzzle.