This section describes the different steps followed to produce any 3D Part multiple times using molding and casting. In this example in specific, SLA 3D Printing was used as part of the process to produce the shape of the product we are planning to multiply using resin.
Step – 1 : Designing the part using Fusion 360
In order to produce a 3D object you first need to have its virtual design. This is to be done using any Computer Aided Design (CAD) software.
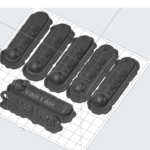
In this case we used fusion 360 to design the 3D Model for the Berytech Fab Lab key chain.
In this project we simply drew a Sphere and a Cylinder, and we extruded the logo. The resulting design was the intersection between the logo extrusion and both the Sphere and the Cylinder.
All parts were then joined with the main body, to form one solid part.
Many variable designs were then produced by using the Fillet and Chamfer tools on different corners in the design.
Step – 2: Exporting Sketch to .STL format
Once the design is ready and the final shape of the object is reached, the next step is to save the objects in .stl format, so that we can open it on any slicer software to prepare for the 3d printing job.
To do that, select the intended body that you wand to extract, and right-click on the body from the Browser on the left. Next, select “Save as stl” .
The STL file is what stores the information about your conceptual 3D object.
Step 3: Slicing – Preparing The File For 3D Printing
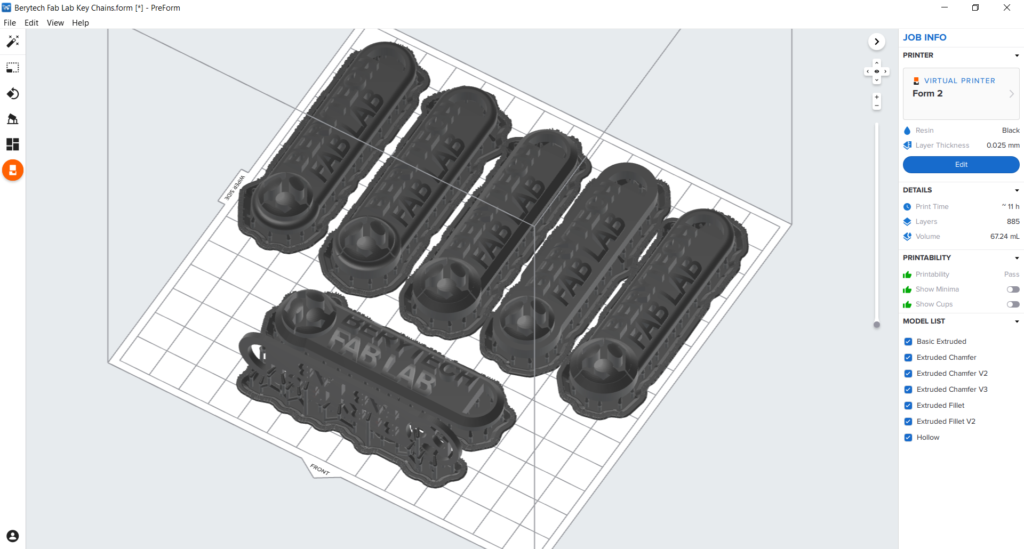
The STL file is then imported into a slicing software that is dedicated for the 3d Printer you will be using. In our case we used PreForm. The next step is deciding on the different parameters of your object and the printing process. Choose the settings that are needed to have a successful print.
- Choose Your Material: Typically you may have an idea about what kind of material you will use before you print. There are many different 3D printing resins available, and you can choose them based on the properties that you want your object to have. For the Form 2, which is the printer available in our lab, you can use various types of material that you can check on this Link. In this project Black Resin was used.
- Choose Your Layer Thickness: The layer thickness defines the surface quality of your print. The thinner the layer, the better surface quality achieved, but printing will take much more time. A higher layer thickness like 100 microns, will lead to a faster printing time. The layer thickness chosen was 0.025mm which produces a high resolution surface finish.
- Choose the Best Orientation: This includes deciding on the size and placement of your print. Rotate the object to reach the best orientation possible that achieves the best quality and lowest support material needed. For fast orientation, press the “Select Base” button and choose the surface you prefer to lay on the printing bed.
- Generate Supports: Choose the basic settings for the supports you want to generate. You can control the density of the supports and the size of the touchpoint with the body. You can remove the internal supports, that you can remove after the print is done. Finally choose the Raft type that you prefer to use. Once all setting are chosen, click the “Auto-Generate All” button to generate the supports.
Once the print is ready, send it to the SLA printer via USB, by clicking the orange print icon. Select which printer to upload the file to from the printer dialogue. The slicing software will then convert the information from the STL file into a G-code, which is a specific code containing exact instructions for the printer to follow.
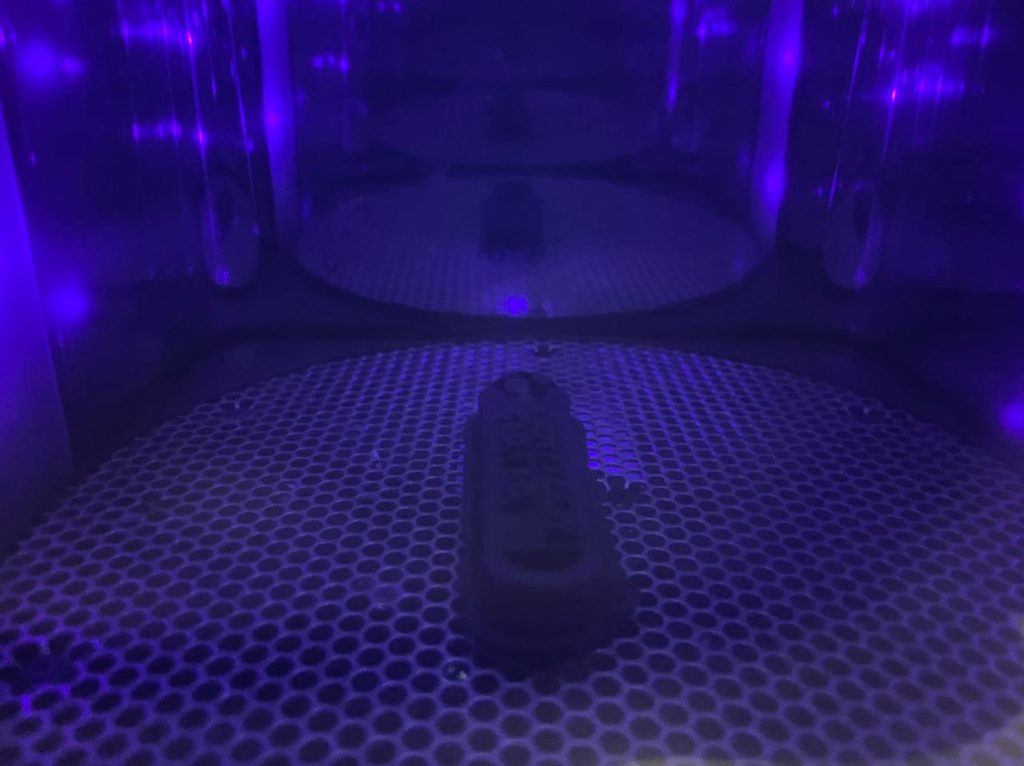
Step 4: 3D Printing
Once uploaded, you are ready to print. But before starting, make sure that the resin cartridge and the resin tank of the chosen material are installed and ready inside the printer. Also install the build platform and lock it into position.
Next, select the file name and confirm the print by pushing the “Start” button on your printer. The resin tank will fill automatically and heat up to around 35°C. The print will start once the tank is full.
This is when the magic happens! The printer will create the object layer by layer. Depending on the size of your object, your printer, and the materials used, the job can be done in a matter of minutes or over several hours.
Step 5: Post-Processing
After the print is over, there are multiple steps to follow in post-processing to get the part ready. Make sure to wear gloves in the next finishing steps.
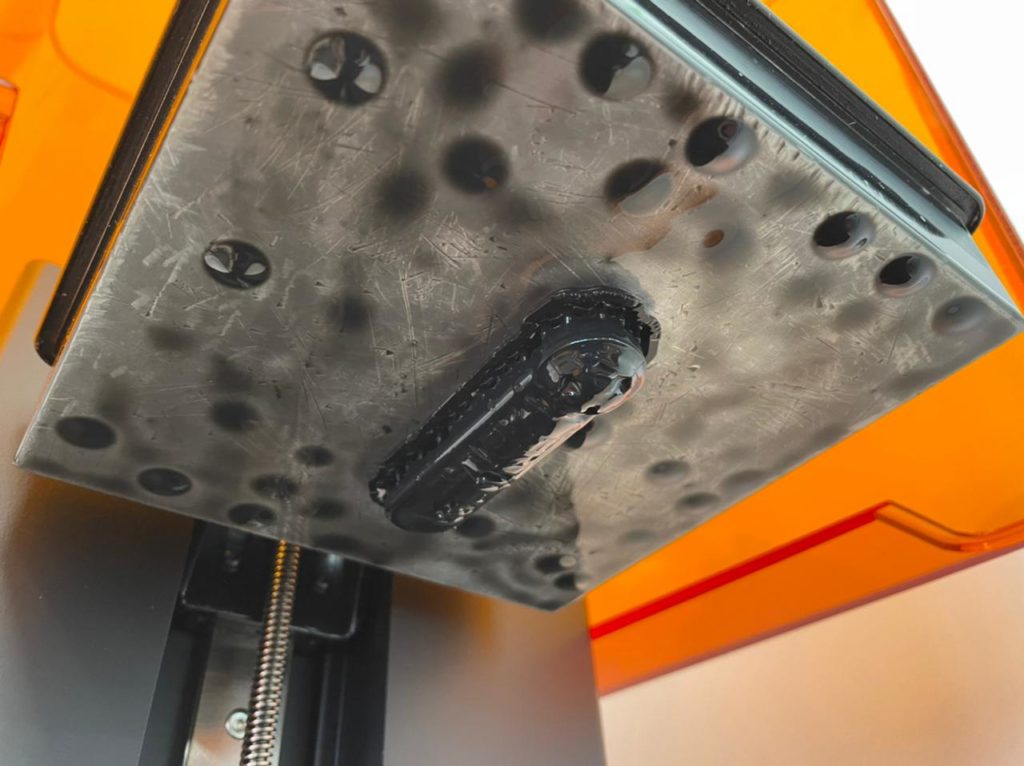
- Remove build platform: Remove the build platform, and turn it directly to prevent dripping, and transfer it to the finishing kit. Make sure you close the printer cover to prevent any impurities from going into the resin containers.
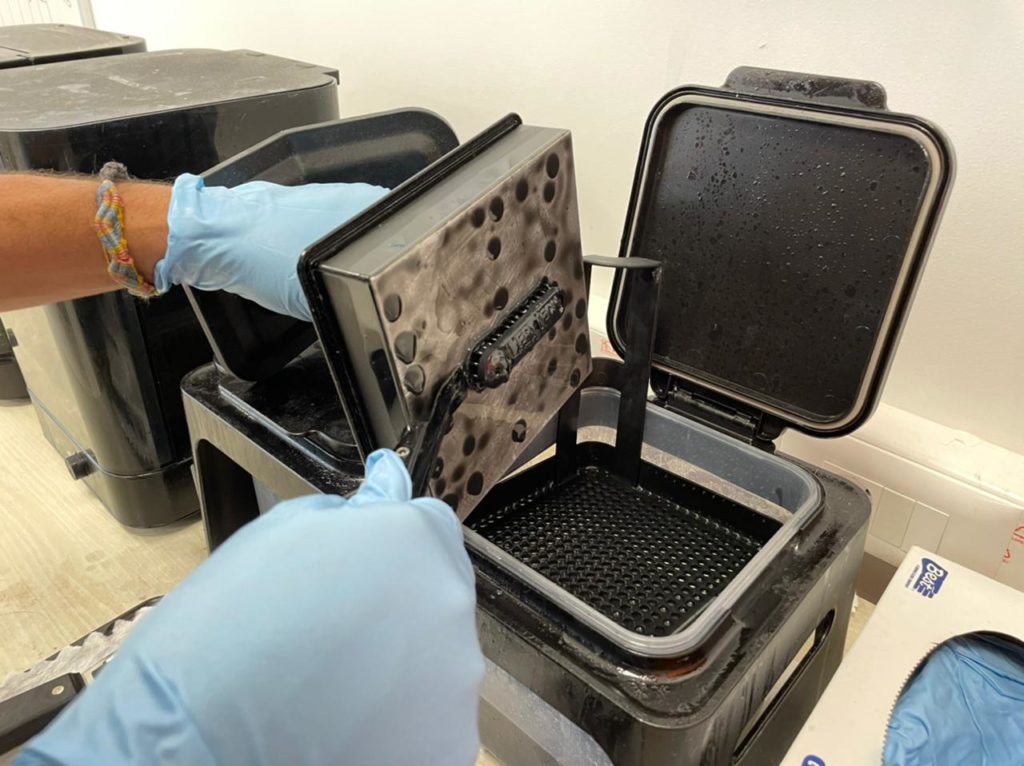
- Remove Your Print: Attach the build platform to the jig, for better handling of the build platform. Release the printed part from the build platform using the removal tools. Clean the build platform to prepare for the next print.
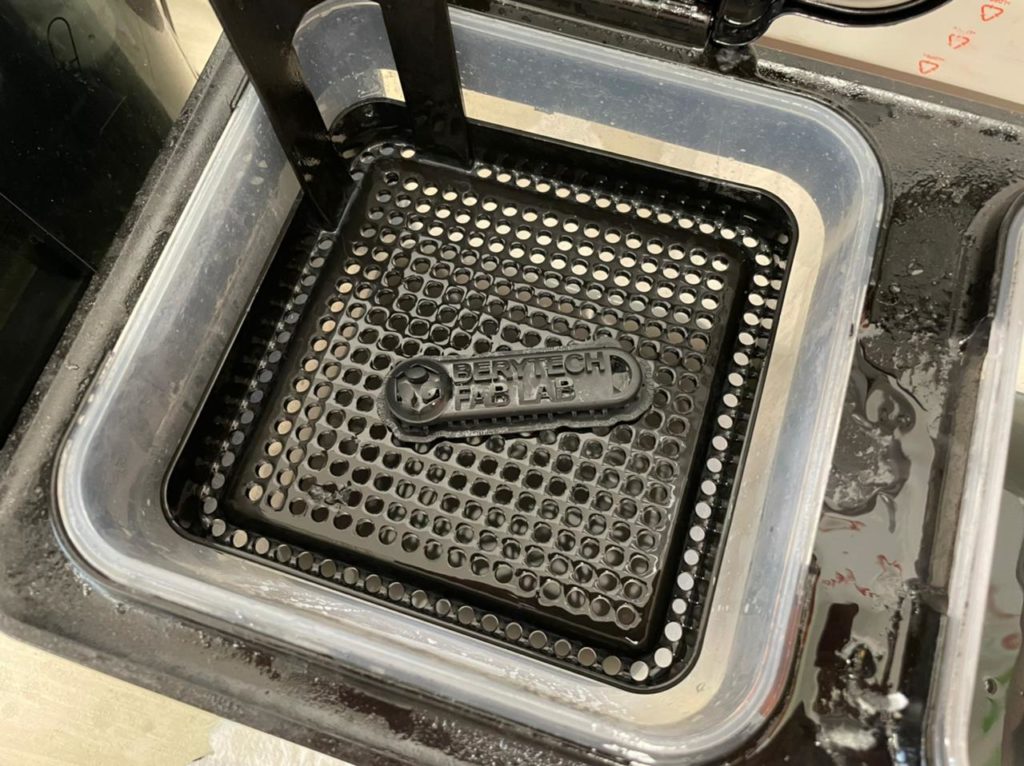
- Wash Your Print: Drop your print in the Rinsing Machine for ten minutes. The rinsing machine contains isopropyl alcohol that removes the uncured resin from your part.
- Finish Your Print: Once the part is dry, remove all support material from your print. You may want to remove supports before or after post-curing depending on the application and material. There may be additional post-processing steps after printing, like sanding, polishing, painting, brushing off powder, etc. for a clean finish. In this case nothing was done for the printed part.
- Post-Curing: Next transfer the part to the automated post-curing station. Custom settings are chosen for each different material and application.
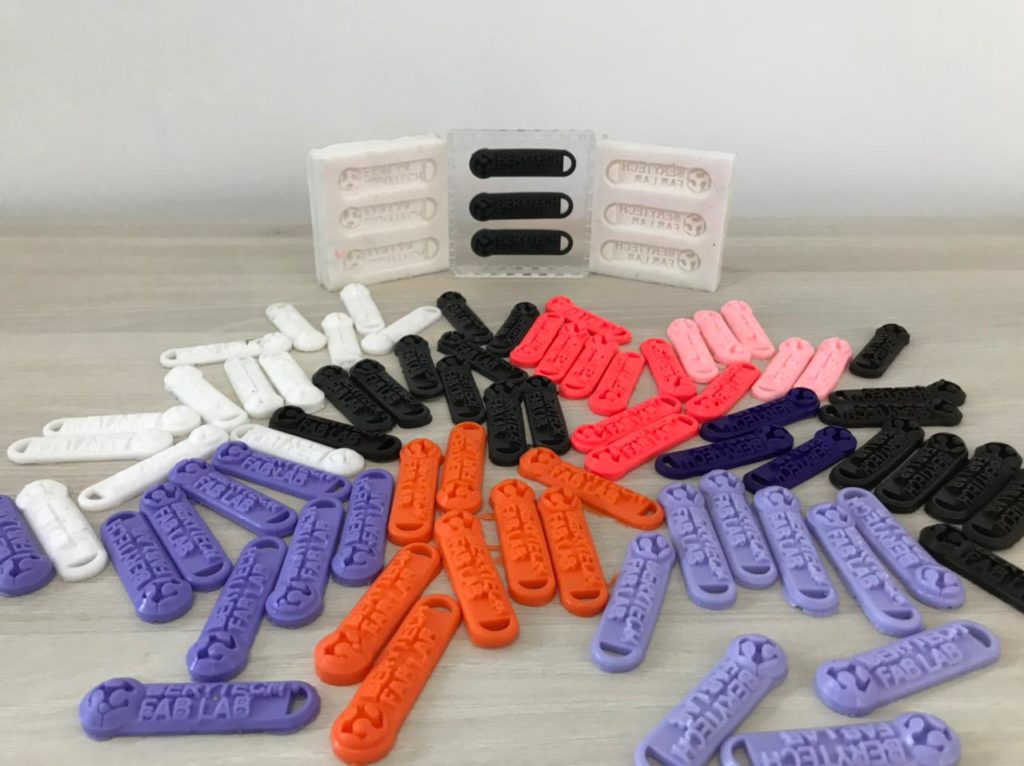
You now have a 3D Printed Key Chain that you made. Next step is to make a mold out of it to easily reproduce it in various colors, and materials.
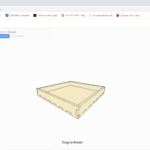
Step 6: Design Container for Silicone Pouring
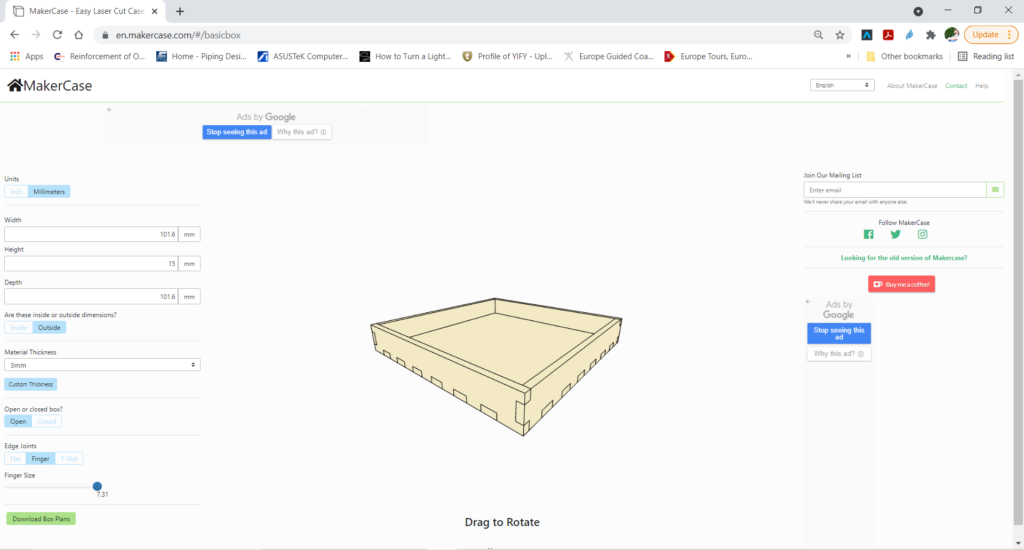
In order to produce the silicone mold, we need to have a container that will be used to stick the intended parts we want to cast in and pour silicone on top of it.
To do that, we had to design a container with the dimensions needed, and cut it later on a laser cutter.
In this example, we used the Maker Case website to create the design of the container. This website allows you to design and extract the cutting files in a fast and easy way. The container we use was around 10cm x 10cm x 1.5cm.
The intended container should be slightly bigger than the shapes we intend to mold, so that we have a good quality mold, with the lowest quantity of waste material.
Step 7: Download Design

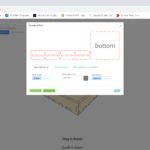
After the design is ready, download the design in .DXF format and cut using a laser cutter.
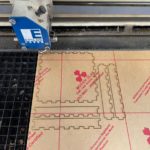
Step 8: Cut Parts of Container on the Laser Cutter
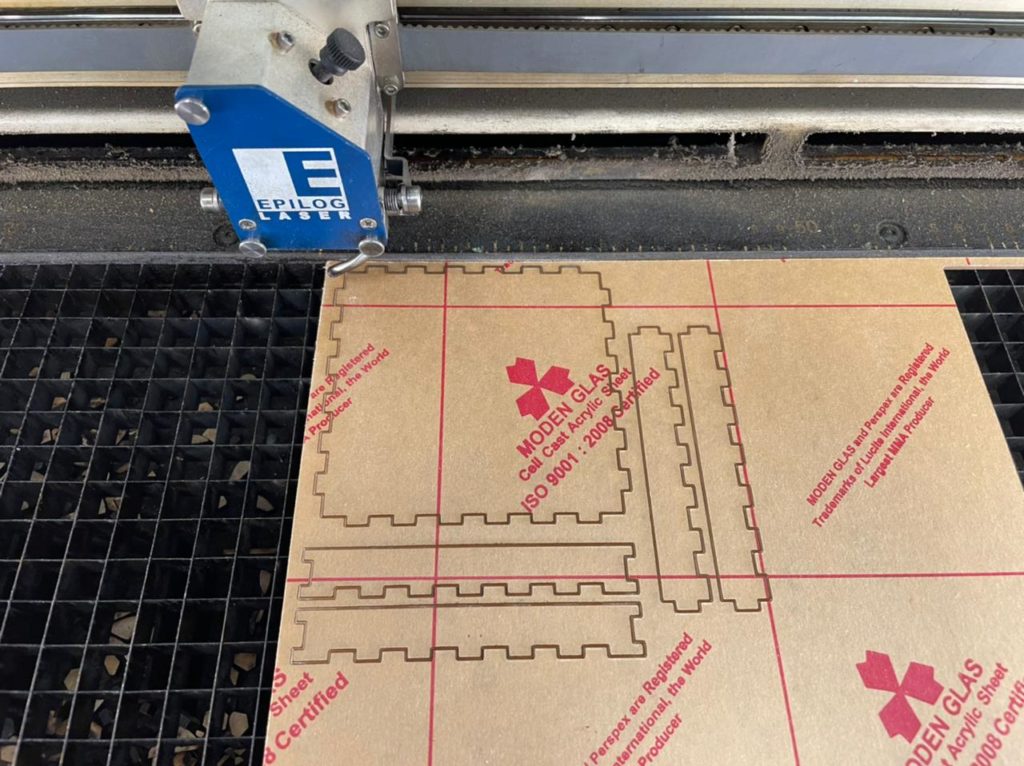
After the design is ready, download the design in .DXF format and cut using a laser cutter.
You will then import the DXF file into a preparation software, in our case we use CorelDraw.
- Choose Your Material: Typically you may have an idea about what kind of material you will use before you laser cut. In this example we will be using clear acrylic.
- Choose Job Type: “Vector” was selected, as we are only cutting in this example.
- Choose Your Parameters: The next step is then deciding on the different parameters for cutting. We have to choose the best settings we need to have the best result. There are different variables that affect the final product coming out of the Laser Cutter. Among those variables are the Power, Speed and DPI.
- Forward the Job: After choosing all the variables, send the order to the laser cutter. But before pressing Play on the Laser cutter, we have to manually set it up the printer with respect to the material we intend to use.
Step 8: Assemble Parts of Container
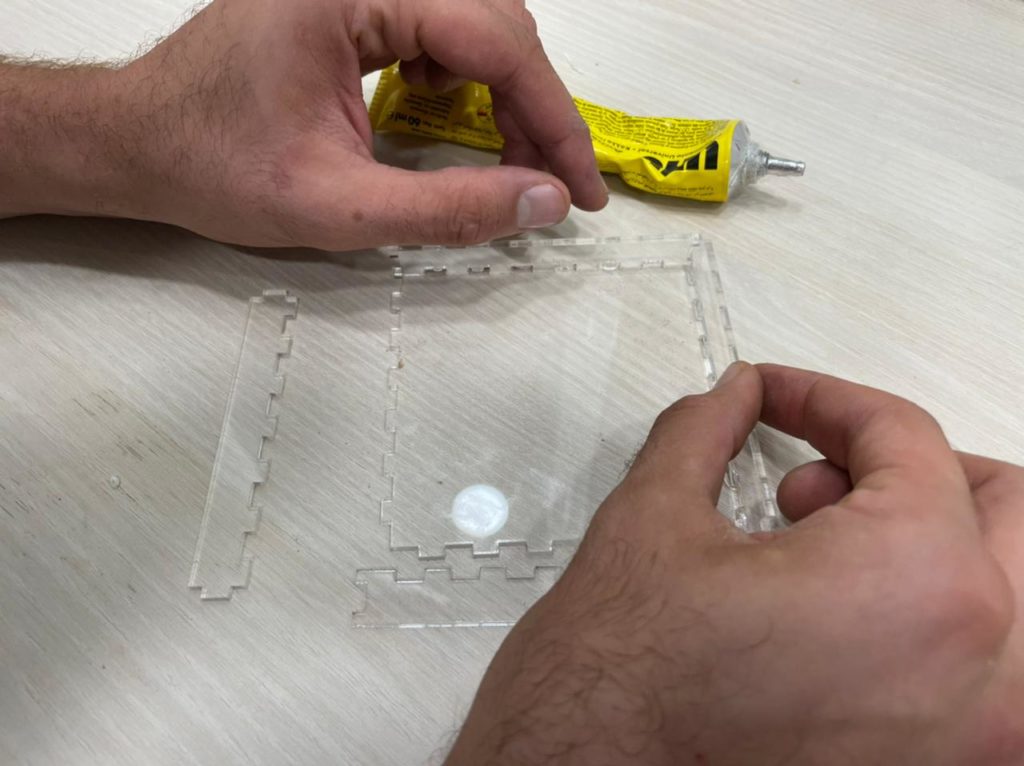
Once all parts are cut, glue the parts together to build the container that will then be used to pour silicone.
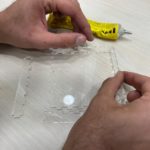
Using double tape, stick the 3d printed parts we want to cast in the bottom on the container.
We now have a mold ready for silicon pouring.
Step 9: Prepare Silicone Mix and Pour the Silicone
The next step is to prepare the Silicone material we want to pour. But before that thoroughly clean and remove all dirt/contaminates from the mold.
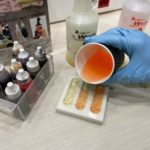
A gram scale with an accuracy to the nearest 1 gram is used to measure the material we want to mix. The mix ratio of the Silicone we are using is 10:1 by WEIGHT.
The material was mixed thoroughly making sure to scrap the sides and bottom of the container until a uniform consistency is achieved with no swirls in the rubber. Mixing and pouring in this case had to be done within 20 mins of working time.
Step 10: Pour the Silicone in the Container
Once the material is thoroughly mixed, pour the mixed rubber slowly in one corner of the mold and allow the rubber to flow slowly and naturally around your master. This process allows the rubber to roll over your master avoiding air entrapment. Avoid pouring the rubber directly over or onto your master.
It is advised to vibrate the mold to remove all trapped bubbles inside the silicone before it cures. There are many techniques that could be used to vibrate the mixture.
In order to remove air bubbles, the mold is vibrated by the help of the bench grinder to remove all the bubbles inside the material. You will notice that air bubbles will appear at the surface. You can pop them by blowing on them.
Step 11: Remove Silicone Mold After Curing
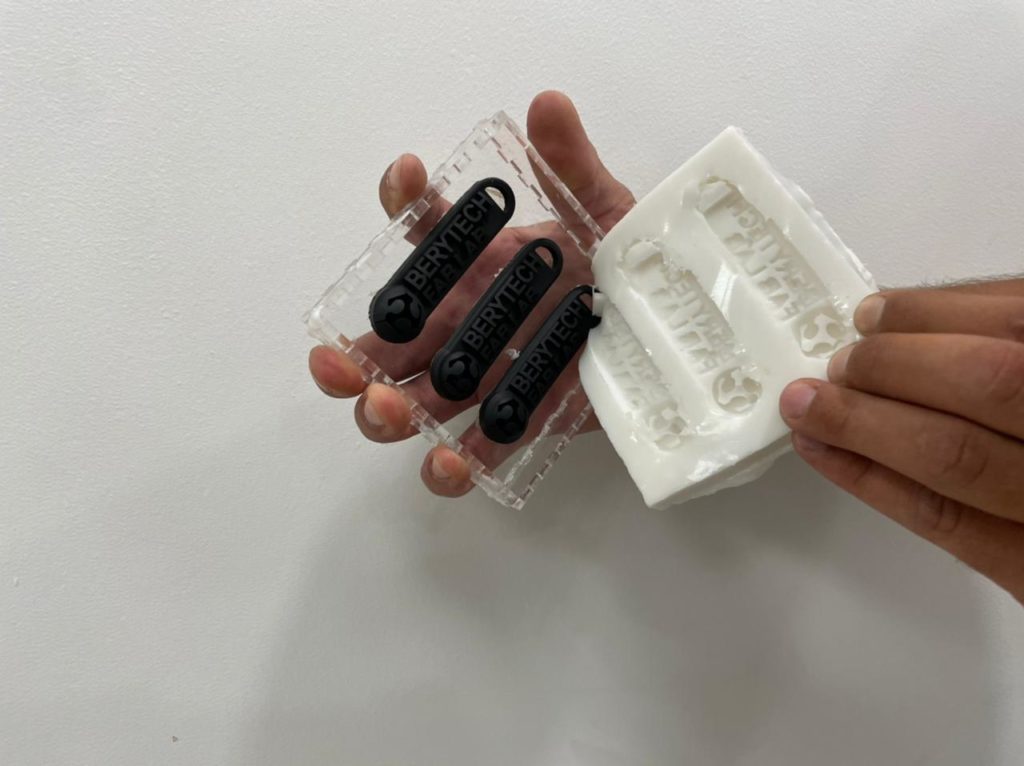
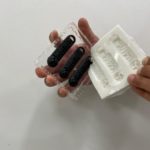
Once the silicone rubber is cured, gently separate the silicone from the original item and remove.
Step 12: Pour Resin in Mold to Produce New Key Chains
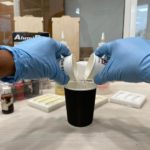
After the silicone mold is ready, the next step is to prepare and pour the resin into the mold. But before mixing and pouring the resin into your mold to achieve a cast resin piece there are a few things to do to prepare the mold, that will greatly enhance the physical properties and curing of your cast resin piece.
The first thing you can do is to preheat your mold. Warm the mold in a microwave for 1 minute/lb of rubber on high. This will only warm your mold and will not affect the microwave or your mold adversely. It will however help the thin sections of your casting to cure more evenly with larger sections and reduce the demold time. It will also help the resin set up uniformly to give you a consistent fully cured cast piece.
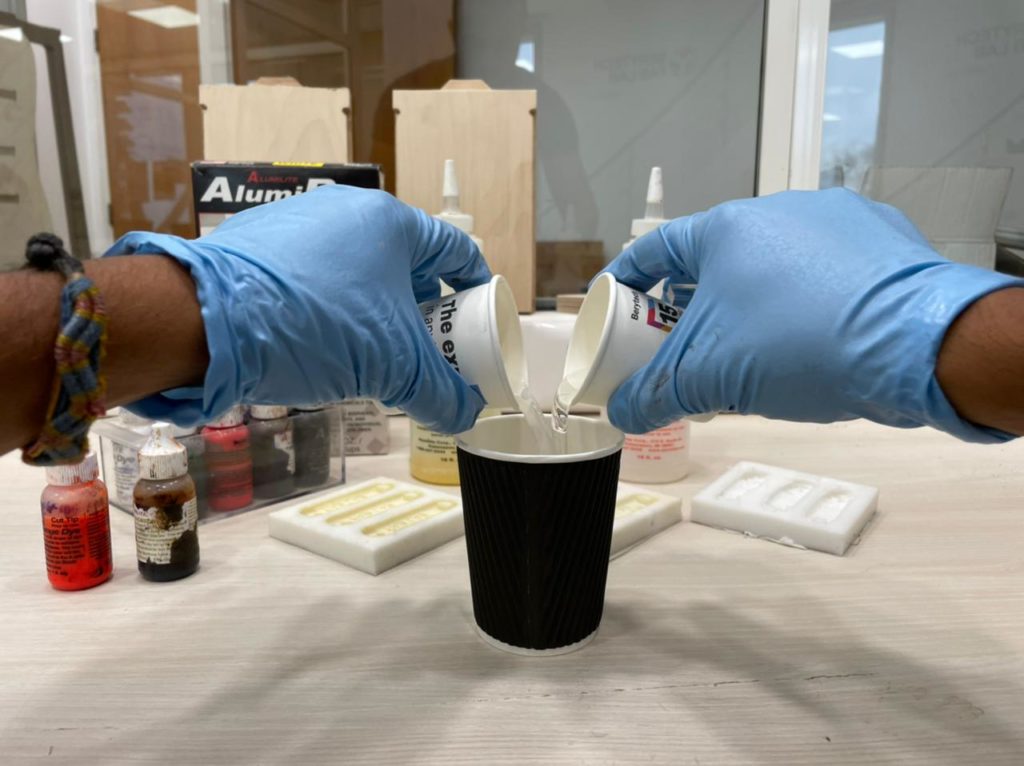
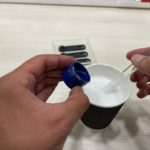
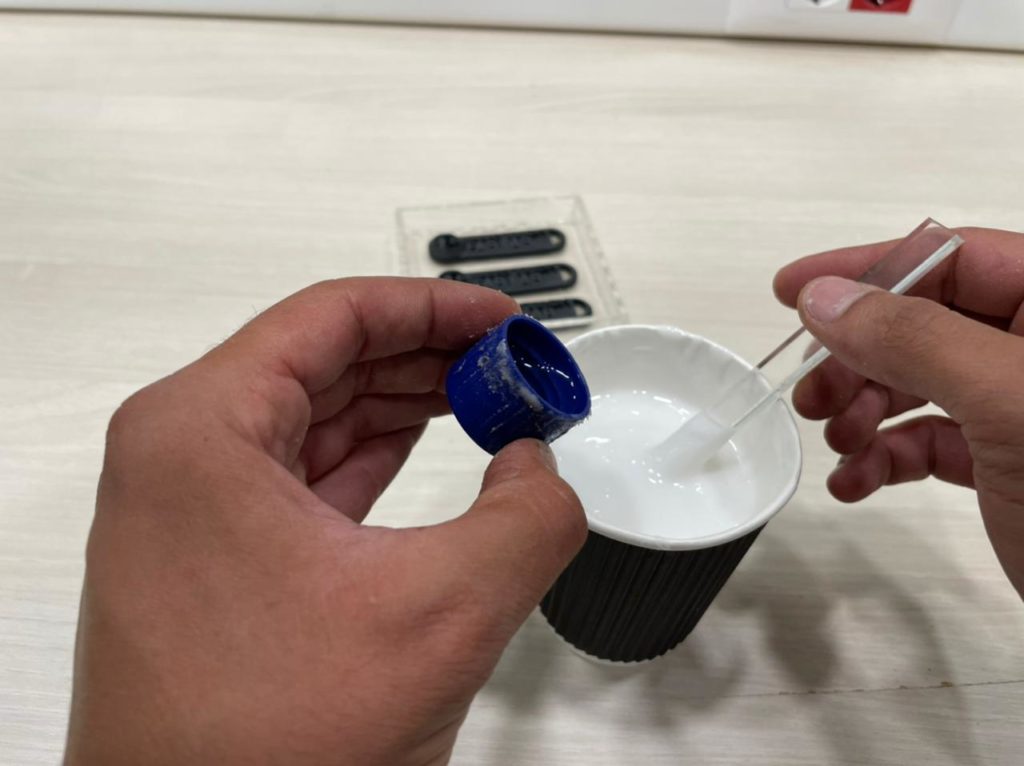
Next we have to mix the A and B side of the material. Before mixing make sure you know the proper mix ratio of the material you are using. Alumilite White is 1:1 by weight and/or by volume. Thus the following procedure is followed to make the casting material and pour it into the mold:
- Measure out equal parts of side A and B. Make sure to shake the bottles prior to puring
- Combine both material in a mixing cup. Use paper or plastic cups and do not shake to prevent air bubbles
- Mix the resin using a mixing stick
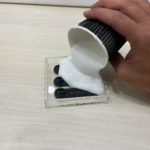
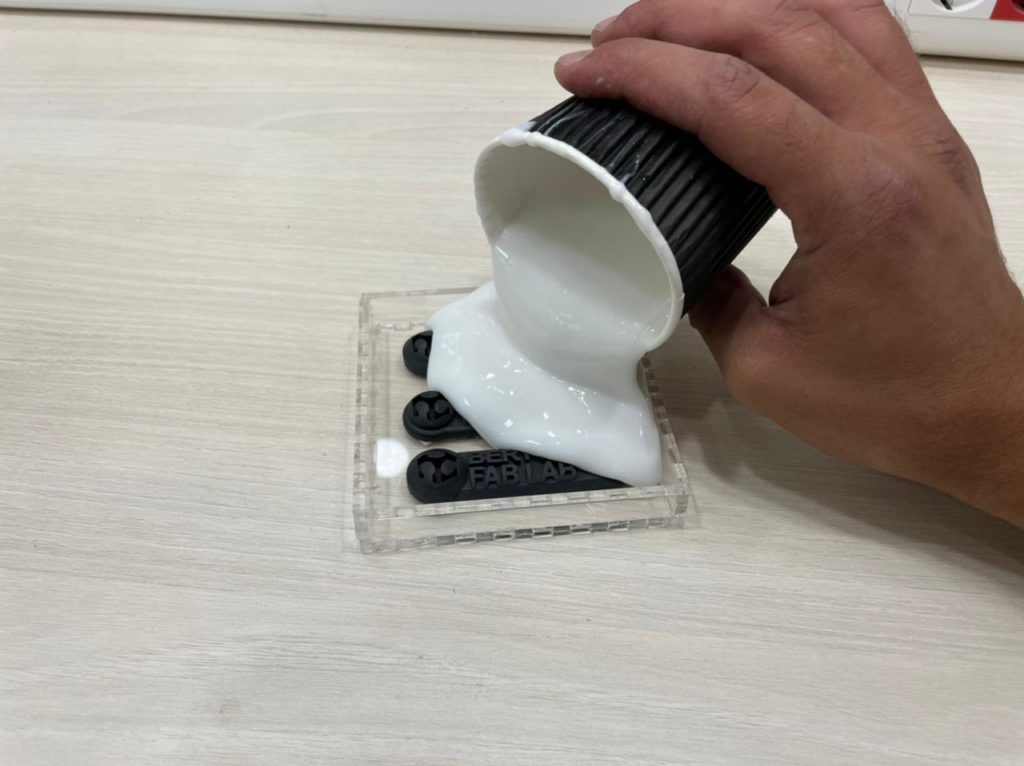
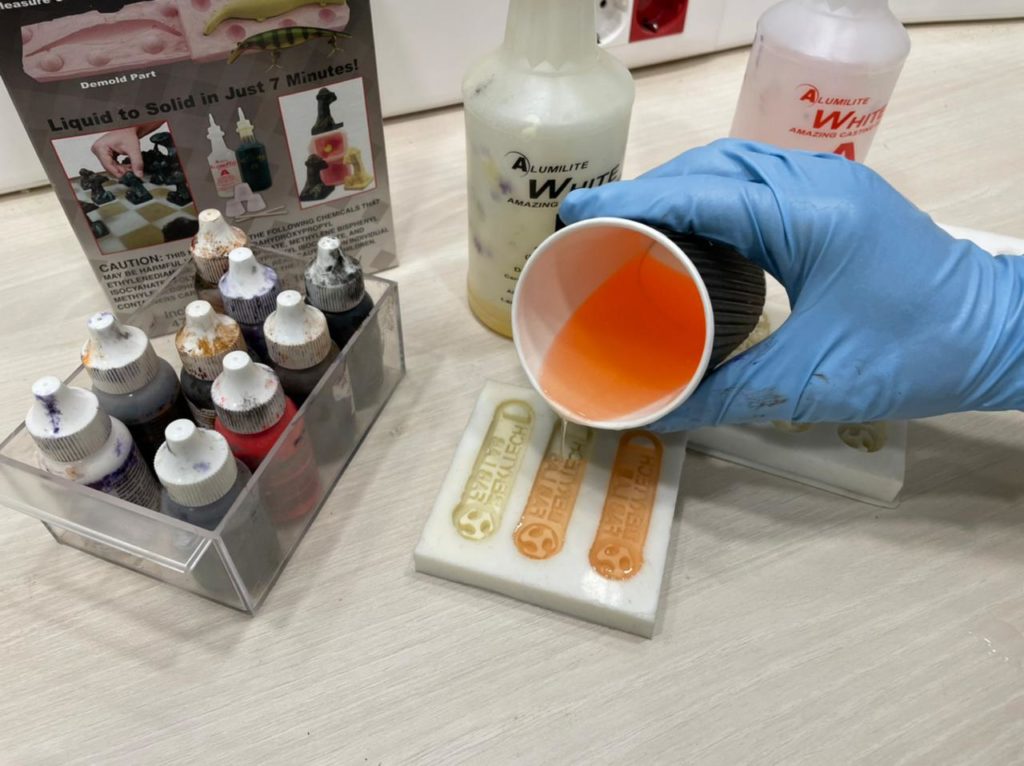
- Pour the mixed resin into the open mold. Slowly pour casting resin down the side of the mold allowing the resin to flow naturally into the detail of the silicone rubber mold.
- You can also gently squeeze the mold to force any trapped air within.